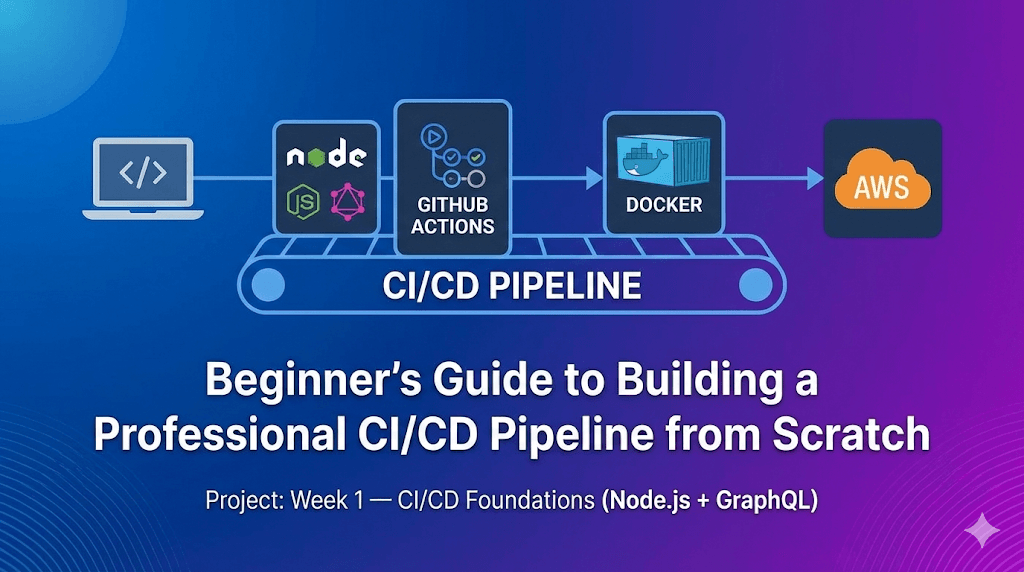
Beginner's Guide to Building a Professional CI/CD Pipeline from Scratch
I am a cloud enthusiast and a full time system administrator with passion for designing robust and efficient cloud architectures to empower businesses. As an AWS Certified Cloud Practitioner, I leverage my skills in Windows Server, DNS, Kubernetes, ECS, Route53, Docker, Ansible, KubeFlow, and Linux to create innovative solutions. I'm constantly expanding my knowledge, currently delving into MSSQL and Kubernetes, and staying updated on the latest cloud trends.
Project: Week 1 → CI/CD Foundations (Node.js + GraphQL)
Repository: Push1697/devops-portfolio
In the world of DevOps, a pipeline isn't just a script that runs tests — it's the factory floor of your software delivery. A well-architected pipeline ensures that code flows from a developer's laptop to production reliably, securely, and rapidly.
This guide walks you through building a complete CI/CD pipeline for a basic Node.js application using GitHub Actions, Docker, and AWS from scratch. Every file, every keyword, every config is explained so you can build the same pipeline yourself without ever opening the GitHub repo.
Whether you're a beginner or refining up your skills, this is the kind of pipeline you'd find behind any serious production deployment.
Table of Contents
1. Architecture Overview
Before diving into code, let's understand the flow. We aren't just "deploying code"; we are orchestrating a software supply chain.
The Pipeline Stages
| Stage | What It Does | Key Tools |
| Build | Clean install (npm ci), syntax check | Node.js 20, npm |
| Test | Run unit/integration tests | Jest / npm test |
| Security | Dependency audit + static analysis | npm audit, CodeQL |
| Docker | Build, scan, and push container image | Docker Buildx, Trivy |
| Deploy | Pull & run on EC2 via SSM (with rollback) | AWS OIDC, SSM |
Pipeline Visualization

The complete pipeline DAG in GitHub Actions. Notice how Test and Security run in parallel after Build, and Docker + Deploy only trigger on the main branch. Total pipeline time: ~2m 49s.
Key design choice: Test and Security are independent of each other. By running them in parallel (both use
needs: build), we cut pipeline time without sacrificing quality gates.
2. Project Setup — Build the Application
Before anything CI/CD, you need a working application. Here's exactly what to build.
Step 1: Initialize the Node.js Project
mkdir week1-cicd && cd week1-cicd
npm init -y
npm install express express-graphql graphql
What each package does:
| Package | Purpose |
express | Web framework — handles HTTP routing and middleware |
express-graphql | Adds a /graphql endpoint with the GraphiQL IDE |
graphql | Core library for defining schemas, types, and resolvers |
Your package.json should look like this:
{
  "name": "node-ci-demo",
  "version": "1.0.0",
  "description": "Sample Node.js app for CI/CD demo",
  "main": "server.js",
  "scripts": {
    "start": "node server.js"
  },
  "license": "MIT",
  "dependencies": {
    "express": "^5.2.1",
    "express-graphql": "^0.12.0",
    "graphql": "^15.10.1"
  }
}
💡 Important: After running
npm install, apackage-lock.jsonfile is generated. You must commit this file — the pipeline usesnpm ciwhich requires it.
Step 2: Create the Data File (MOCK_DATA.json)
[
  { "id": 1, "firstName": "Asha", "lastName": "Iyer", "email": "asha.iyer@example.com", "password": "pass1234" },
  { "id": 2, "firstName": "Noah", "lastName": "Cole", "email": "noah.cole@example.com", "password": "pass2345" },
  { "id": 3, "firstName": "Mina", "lastName": "Khan", "email": "mina.khan@example.com", "password": "pass3456" },
  { "id": 4, "firstName": "Luis Kumar", "lastName": "Santos", "email": "luis.santos@example.com", "password": "pass4567" }
]
Step 3: Create the Server (server.js)
The server code sets up:
| Endpoint | Type | What It Does |
/ | HTML | Interactive user search UI |
/graphql | GraphQL | Full GraphQL API with queries + mutations |
/rest/getAllUsers | REST | Returns all users as JSON |
/api/users/search?q= | REST | Search users by name or email |
Here's the core structure of server.js:
const express = require("express");
const graphql = require("graphql");
const { graphqlHTTP } = require("express-graphql");

const app = express();
const PORT = 5000;
const userData = require("./MOCK_DATA.json");

const {
  GraphQLObjectType,
  GraphQLSchema,
  GraphQLList,
  GraphQLInt,
  GraphQLString,
} = graphql;

// Define the User type (what fields a "User" has)
const UserType = new GraphQLObjectType({
  name: "User",
  fields: () => ({
    id: { type: GraphQLInt },
    firstName: { type: GraphQLString },
    lastName: { type: GraphQLString },
    email: { type: GraphQLString },
    password: { type: GraphQLString },
  }),
});

// Define queries (how to READ data)
const RootQuery = new GraphQLObjectType({
  name: "RootQueryType",
  fields: {
    getAllUsers: {
      type: new GraphQLList(UserType),
      args: { id: { type: GraphQLInt } },
      resolve() { return userData; },         // Returns all users
    },
    findUserById: {
      type: UserType,
      args: { id: { type: GraphQLInt } },
      resolve(parent, args) {
        return userData.find((item) => item.id === args.id);
      },
    },
  },
});

// Define mutations (how to WRITE data)
const Mutation = new GraphQLObjectType({
  name: "Mutation",
  fields: {
    createUser: {
      type: UserType,
      args: {
        firstName: { type: GraphQLString },
        lastName: { type: GraphQLString },
        email: { type: GraphQLString },
        password: { type: GraphQLString },
      },
      resolve(parent, args) {
        const newUser = {
          id: userData.length + 1,
          ...args,
        };
        userData.push(newUser);
        return newUser;
      },
    },
  },
});

// Build the schema and mount GraphQL + REST endpoints
const schema = new GraphQLSchema({ query: RootQuery, mutation: Mutation });

app.use("/graphql", graphqlHTTP({ schema, graphiql: true }));

app.get("/rest/getAllUsers", (req, res) => { res.send(userData); });

app.get("/api/users/search", (req, res) => {
  const query = (req.query.q || "").toLowerCase().trim();
  const results = query
    ? userData.filter((u) =>
        [u.firstName, u.lastName, u.email]
          .join(" ").toLowerCase().includes(query)
      )
    : userData;
  res.json(results);
});

// The "/" route serves an HTML page with a search UI (omitted for brevity)

app.listen(PORT, () => { console.log("Server running"); });
Test it locally:
npm start
# Open http://localhost:5000

The deployed application running on EC2. Notice the URL — this is the public IP of our AWS instance on port 5000, exactly what the pipeline deploys to.
Step 4: Create the Dockerfile (Multi-Stage Distroless Build)
This is where most beginners just write FROM node and call it a day. We don't do that.
# Stage 1: Dependencies — use a full Node image to install packages
FROM node:20-alpine3.18 AS builder
WORKDIR /app
COPY package*.json ./
RUN npm ci --omit=dev --ignore-scripts \
    && npm cache clean --force \
    && rm -rf /root/.npm /tmp/*

# Stage 2: Runtime — copy only what's needed into a minimal image
FROM gcr.io/distroless/nodejs20-debian12:nonroot
WORKDIR /app
COPY --from=builder --chown=nonroot:nonroot /app/node_modules ./node_modules
COPY --chown=nonroot:nonroot server.js .
COPY --chown=nonroot:nonroot MOCK_DATA.json .
EXPOSE 5000
CMD ["server.js"]
Line-by-line explanation:
| Line | What It Does |
FROM node:20-alpine3.18 AS builder | Stage 1 uses Alpine Linux (small) to install deps. Named builder for reference |
COPY package*.json ./ | Copies both package.json and package-lock.json into the container |
npm ci --omit=dev | Clean install, production dependencies only — skips devDependencies |
--ignore-scripts | Skips lifecycle scripts (postinstall, etc.) — reduces attack surface |
npm cache clean --force | Removes npm cache — smaller image layer |
FROM gcr.io/distroless/nodejs20-debian12:nonroot | Stage 2 uses Google's Distroless — no shell, no package manager, no OS utils |
COPY --from=builder | Copies node_modules from Stage 1 into the final image |
--chown=nonroot:nonroot | Files owned by non-root user — container never runs as root |
CMD ["server.js"] | Distroless uses exec form (no shell), so we pass the filename directly |
💡 Result: Our final image is 51.6 MB instead of ~1 GB with a standard
node:20base. You can verify this in Docker Hub — smaller image = faster pulls = faster deployments.
Step 5: Create the .dockerignore
node_modules
npm-debug.log
.git
.env
tests/
*.test.js
coverage/
README.md
Why this matters: Without .dockerignore, Docker copies your entire node_modules (which gets rebuilt inside), .git history, and test files into the build context — making builds slower and images larger.
Step 6: Commit Everything
git add .
git commit -m "feat: add Node.js app with GraphQL + REST endpoints"
git push origin main
⚠️ Don't forget
package-lock.json! The pipeline'snpm cicommand requires it. If missing, the build fails immediately.
3. Docker Hub Setup — Create Your Token
Before the pipeline can push images, you need a Docker Hub account and an access token.
Step 1: Navigate to Personal Access Tokens
Go to Docker Hub → Account Settings → Security → Personal access tokens.

The Docker Hub PAT settings page. If this is your first token, you'll see the "Generate new token" button.
Step 2: Create the Access Token
Click Generate new token and fill in:
| Field | Value | Why |
| Access token description | github_actions | Identifies what this token is used for |
| Expiration date | 30 days (or more) | Set based on your security policy |
| Access permissions | Read & Write | Push requires Write; Read pulls images |

Fill in exactly as shown. The "Read & Write" permission lets your pipeline push images to Docker Hub.
Step 3: Copy and Save the Token
After clicking Generate, Docker Hub shows your token once. Copy it immediately.
Example: dckr_pat_ABC123DEF456GHI789JKL0MN
⚠️ This token will never be shown again. If you lose it, you must generate a new one.
Why a Personal Access Token (PAT) over your password?
Can be revoked without changing your Docker Hub password
Can be scoped to specific permissions (Read, Write, Delete)
Can be audited — you see when it was last used
If compromised, your account password stays safe
4. GitHub Repository Secrets
Now we add all credentials to GitHub so the pipeline can use them securely.
How to Add a Secret
Go to your GitHub repo → Settings → Secrets and variables → Actions
Click New repository secret
Enter the Name and Value
Click Add secret
Secrets You Need to Add
| Secret Name | Value | Purpose |
DOCKERHUB_USERNAME | Your Docker Hub username (e.g., deviltalks) | Docker login |
DOCKERHUB_TOKEN | The PAT from Step 3 above | Docker login |
AWS_ROLE_ARN | arn:aws:iam::123456789012:role/github-actions-oidc-role | OIDC authentication |
EC2_INSTANCE_ID | i-0xxxxxxxxxxxxxxxxx | SSM deployment target |
💡 How GitHub Secrets work: Values are encrypted at rest using libsodium sealed boxes. They are never printed in logs — even if your pipeline does
echo ${{ secrets.DOCKERHUB_TOKEN }}, it shows***. They cannot be read by forks or PRs from forks.
5. AWS Infrastructure Setup
This is where most tutorials skip. But in real life, infrastructure is where 90% of issues happen.
5.1 AWS OIDC Configuration (No Static Access Keys!)
We do not use AWS_ACCESS_KEY_ID and AWS_SECRET_ACCESS_KEY. Those are long-lived credentials — if they leak, an attacker has access until you manually rotate them. That's unacceptable.
Instead, we use OpenID Connect (OIDC):
GitHub Actions ──► (JWT token) ──► AWS STS ──► Temporary credentials (15 min)
AWS says: "I trust GitHub Actions from this specific repo to assume this specific role*, and only for a short time."*
Step-by-step setup:
Go to AWS IAM → Identity Providers → Add provider
Select OpenID Connect
Provider URL:
https://token.actions.githubusercontent.comAudience:
sts.amazonaws.comClick Add provider
Then create the IAM Role:
Go to IAM → Roles → Create role
Trusted entity type: Web identity
Identity provider:
token.actions.githubusercontent.comAudience:
sts.amazonaws.comClick Next
Attach permission:
AmazonSSMManagedInstanceCoreRole name:
github-actions-oidc-roleClick Create role
Update the Trust Policy (IAM → Roles → your role → Trust relationships → Edit):
{
  "Version": "2012-10-17",
  "Statement": [
    {
      "Effect": "Allow",
      "Principal": {
        "Federated": "arn:aws:iam::YOUR_ACCOUNT_ID:oidc-provider/token.actions.githubusercontent.com"
      },
      "Action": "sts:AssumeRoleWithWebIdentity",
      "Condition": {
        "StringEquals": {
          "token.actions.githubusercontent.com:aud": "sts.amazonaws.com"
        },
        "StringLike": {
          "token.actions.githubusercontent.com:sub": "repo:Push1697/devops-portfolio:*"
        }
      }
    }
  ]
}
⚠️ Critical: The
subcondition locks this to your exact repository. Without it, any GitHub repo could assume your AWS role.
Copy the Role ARN (e.g., arn:aws:iam::450070307294:role/github-actions-oidc-role) → save it as the AWS_ROLE_ARN GitHub Secret.
5.2 EC2 Instance Preparation
Your EC2 deployment target needs four things:
| Requirement | How to Set It Up |
| Docker installed | sudo yum install docker -y && sudo systemctl enable --now docker |
| SSM Agent running | Pre-installed on Amazon Linux. Verify: systemctl status amazon-ssm-agent |
| IAM Instance Role | Attach a role with AmazonSSMManagedInstanceCore policy (see below) |
| Security Group | Allow inbound TCP on port 5000 from 0.0.0.0/0 |
How to attach AmazonSSMManagedInstanceCore to your EC2:
Go to AWS EC2 → Instances → Select your instance
Look for IAM Role in the details panel
If no role is attached: Actions → Security → Modify IAM role
Select a role that has
AmazonSSMManagedInstanceCoreattached (or create one)Click Update IAM role
To verify the role's permissions:
Go to IAM → Roles → Click the role name
Under Permissions, confirm
AmazonSSMManagedInstanceCoreis listedIf missing: Add permissions → Attach policies → Search for
AmazonSSMManagedInstanceCore
💡 Why SSM instead of SSH? With SSM Run Command, you don't need to open port 22 to the internet. No SSH keys to manage, no bastion hosts. All commands are logged in CloudTrail. It's the modern, secure way to run commands on EC2.
6. The Pipeline — Complete ci-cd-pipeline.yml Walkthrough
This file lives at .github/workflows/ci-cd-pipeline.yml. Let's dissect every single line.
6.1 Name, Triggers & Permissions
name: week-1 CI-CD Pipeline

on:
  push:
    branches: ["main", "develop"]
  pull_request:
    branches: ["main"]
  workflow_dispatch:

permissions:
  contents: read
  id-token: write
  security-events: write
Line-by-line:
| Line | What It Does |
name: week-1 CI-CD Pipeline | Display name shown in GitHub Actions tab |
on.push.branches: ["main", "develop"] | Runs on every push to main or develop branches |
on.pull_request.branches: ["main"] | Runs when a PR is opened/updated against main — validates before merge |
workflow_dispatch: | Adds a "Run workflow" button in GitHub UI for manual triggers |
permissions.contents: read | Allows the workflow to read (checkout) your repository code |
permissions.id-token: write | Critical for OIDC — lets GitHub generate a JWT token for AWS auth |
permissions.security-events: write | Required for CodeQL to upload scan results to GitHub's Security tab |
⚠️ #1 mistake beginners make: Forgetting
id-token: write. Without it, the OIDC handshake with AWS fails silently and the deploy job errors with a cryptic permissions message.
6.2 Global Environment Variables
env:
  NODE_VERSION: "20"
  APP_DIR: "week1-cicd"
  IMAGE_NAME: ${{ secrets.DOCKERHUB_USERNAME }}/node-ci-demo
  CONTAINER_NAME: "node-ci-demo"
  APP_PORT: "5000"
  AWS_REGION: "ap-south-1"
  AWS_ROLE_ARN: ${{ secrets.AWS_ROLE_ARN }}
  EC2_INSTANCE_ID: ${{ secrets.EC2_INSTANCE_ID }}
| Variable | Value | Why It's Here |
NODE_VERSION | "20" | Used by setup-node — change once, applies everywhere |
APP_DIR | "week1-cicd" | Our app lives in a subdirectory, not the repo root |
IMAGE_NAME | <username>/node-ci-demo | Full Docker image name — constructed from secrets |
CONTAINER_NAME | "node-ci-demo" | Name of the Docker container on EC2 |
APP_PORT | "5000" | Port the app listens on |
AWS_REGION | "ap-south-1" | Mumbai region — change to your deploy region |
AWS_ROLE_ARN | From secrets | The IAM role ARN for OIDC auth |
EC2_INSTANCE_ID | From secrets | Target EC2 instance for deployment |
💡 DRY Principle: If you ever need to change the Node version, image name, or AWS region, you change it in one place — not scattered across 5 jobs. as this practice creates simplicity and manageability of your pipeline if it is complex.
6.3 Concurrency Control
concurrency:
  group: ${{ github.workflow }}-${{ github.ref }}
  cancel-in-progress: true
| Keyword | What It Does |
group: | Creates a unique group per workflow + branch combo |
cancel-in-progress | If you push 3 commits rapidly, only the latest pipeline runs — older ones are cancelled |
Why this matters: This saves GitHub Actions minutes (and money). Without it, 3 rapid pushes = 3 concurrent pipelines fighting over resources.
6.4 Job 1: Build
jobs:
  build:
    name: Build
    runs-on: ubuntu-latest

    steps:
      - name: Checkout code
        uses: actions/checkout@v4

      - name: Setup Node.js
        uses: actions/setup-node@v4
        with:
          node-version: ${{ env.NODE_VERSION }}
          cache: npm
          cache-dependency-path: ${{ env.APP_DIR }}/package-lock.json

      - name: Install dependencies
        run: npm ci
        working-directory: ${{ env.APP_DIR }}

      - name: Validate server entry
        run: node -c server.js
        working-directory: ${{ env.APP_DIR }}

      - name: Lint (if configured)
        run: npm run lint --if-present
        working-directory: ${{ env.APP_DIR }}
Step-by-step explanation:
| Step | What It Does | Why |
actions/checkout@v4 | Clones your repository into the GitHub runner | Without this, the runner VM has no code |
actions/setup-node@v4 | Installs Node.js 20 on the runner | cache: npm reuses previously downloaded packages |
cache-dependency-path | Points to week1-cicd/package-lock.json | Tells the cache which lockfile to hash for cache invalidation |
npm ci | Clean install from lockfile | Deterministic — fails if lockfile is missing or out of sync |
node -c server.js | Syntax check only — parses the file without executing it | Catches typos, missing brackets, or syntax errors instantly |
npm run lint --if-present | Runs linting only if a lint script exists in package.json | --if-present prevents failure if no linter is configured |
What is runs-on: ubuntu-latest? This tells GitHub to run this job on a fresh Ubuntu virtual machine. Each job gets its own clean VM — nothing carries over between jobs unless you explicitly share artifacts.
What is working-directory? Our app lives inside week1-cicd/, not the repo root. This keyword tells each step to cd into that folder before running the command.
Why npm ci instead of npm install?
| Feature | npm install | npm ci |
Uses package-lock.json | Optional | Required |
| Modifies lockfile | Yes | Never |
Deletes node_modules first | No | Yes |
| Deterministic | No | Yes |
| Speed | Slower | Faster |
6.5 Job 2: Test
  test:
    name: Test
    runs-on: ubuntu-latest
    needs: build

    steps:
      - name: Checkout code
        uses: actions/checkout@v4

      - name: Setup Node.js
        uses: actions/setup-node@v4
        with:
          node-version: ${{ env.NODE_VERSION }}
          cache: npm
          cache-dependency-path: ${{ env.APP_DIR }}/package-lock.json

      - name: Install dependencies
        run: npm ci
        working-directory: ${{ env.APP_DIR }}

      - name: Run tests (if configured)
        run: npm test --if-present
        working-directory: ${{ env.APP_DIR }}
Key keyword — needs: build:
This creates a dependency chain. The test job waits for build to succeed before starting. If the build fails, test never runs — saving compute time and money.
💡 Why does each job re-checkout and re-install? Each GitHub Actions job runs on a separate VM. The VM from the Build job is destroyed when it finishes. So Test needs its own checkout and install. This is by design — isolation prevents contamination between jobs.
npm test --if-present: Runs the test script if it exists in package.json, otherwise skips gracefully. This is useful in early-stage projects where tests haven't been written yet.
6.6 Job 3: Security (Defense in Depth)
  security:
    name: Security
    runs-on: ubuntu-latest
    needs: build

    steps:
      - name: Checkout code
        uses: actions/checkout@v4

      - name: Setup Node.js
        uses: actions/setup-node@v4
        with:
          node-version: ${{ env.NODE_VERSION }}
          cache: npm
          cache-dependency-path: ${{ env.APP_DIR }}/package-lock.json

      - name: Install dependencies
        run: npm ci
        working-directory: ${{ env.APP_DIR }}

      - name: Run npm audit
        run: npm audit --audit-level=moderate || true
        working-directory: ${{ env.APP_DIR }}

      - name: CodeQL init
        uses: github/codeql-action/init@v4
        with:
          languages: javascript

      - name: CodeQL analyze
        uses: github/codeql-action/analyze@v4
Notice: Both test and security have needs: build. They are independent of each other, so they run in parallel. This is visible in the pipeline visualization above.
We use three layers of security scanning (Defense in Depth):
Layer 1: npm audit        → Known vulnerabilities in npm packages
Layer 2: GitHub CodeQL     → Static analysis of YOUR code (injections, logic bugs)
Layer 3: Trivy            → OS-level CVEs in the Docker image (runs in Docker job)
Keyword breakdown:
| Keyword / Flag | What It Does | ||
npm audit --audit-level=moderate | Only flag vulnerabilities rated moderate or higher | ||
| ` | true` | Don't fail the job on audit warnings — log them but continue | |
codeql-action/init | Downloads and initializes the CodeQL analysis engine for JavaScript | ||
codeql-action/analyze | Runs the actual scan and uploads results to GitHub's Security tab |
💡 Why
|| trueon npm audit? In a real production pipeline, you might wantnpm auditto fail the build. Here we use|| trueso advisory-level warnings don't block deploys during development. In stricter environments, remove the|| true.
6.7 Job 4: Docker Build, Scan & Push
This is the longest job. Let's break it down step by step.
  docker:
    name: Docker
    runs-on: ubuntu-latest
    needs: [test, security]
    if: github.event_name == 'push' && github.ref == 'refs/heads/main'
| Keyword | What It Does |
needs: [test, security] | Waits for both Test and Security to pass before starting |
if: github.event_name == 'push' | Only runs on direct pushes, not on pull requests |
github.ref == 'refs/heads/main' | Only runs on the main branch — feature branches never push images |
Step 1 → Extract Docker Metadata (Smart Tagging):
      - name: Extract Docker metadata
        id: meta
        uses: docker/metadata-action@v5
        with:
          images: ${{ env.IMAGE_NAME }}
          tags: |
            type=ref,event=branch
            type=ref,event=pr
            type=sha,prefix={{branch}}-
            type=raw,value=latest,enable={{is_default_branch}}
This automatically generates Docker tags for your image:
| Tag Rule | Example Output | Purpose |
type=ref,event=branch | main | Tags with branch name |
type=ref,event=pr | pr-42 | Tags for pull requests |
type=sha,prefix={{branch}}- | main-c260cb1 | Branch + short commit SHA |
type=raw,value=latest | latest | Only on the default branch |
The SHA tag (main-c260cb1) is critical — it lets you trace any running container back to the exact Git commit that built it.
Step 2 → Docker Hub Login:
      - name: Log in to Docker Hub
        uses: docker/login-action@v3
        with:
          username: ${{ secrets.DOCKERHUB_USERNAME }}
          password: ${{ secrets.DOCKERHUB_TOKEN }}
This authenticates to Docker Hub using the secrets we configured earlier. The password field uses the PAT (Personal Access Token), not your actual Docker Hub password.
Step 3 → Set Up Docker Buildx:
      - name: Set up Docker Buildx
        uses: docker/setup-buildx-action@v3
What is Buildx? It's Docker's extended build tool. It enables multi-platform builds and, critically, caching support via GitHub Actions cache. Without Buildx, you can't use cache-from / cache-to.
Step 4 → Build and Push:
      - name: Build and push
        uses: docker/build-push-action@v6
        with:
          context: ${{ env.APP_DIR }}
          file: ${{ env.APP_DIR }}/Dockerfile
          push: true
          tags: ${{ steps.meta.outputs.tags }}
          labels: ${{ steps.meta.outputs.labels }}
          cache-from: type=gha
          cache-to: type=gha,mode=max
| Keyword | What It Does |
context: ${{ env.APP_DIR }} | Build context is the week1-cicd/ directory |
file: ${{ env.APP_DIR }}/Dockerfile | Path to our multi-stage Dockerfile |
push: true | Pushes the built image to Docker Hub |
tags: ${{ steps.meta.outputs.tags }} | Uses tags generated by the metadata step |
cache-from: type=gha | Pulls cached layers from GitHub Actions cache |
cache-to: type=gha,mode=max | Saves all layers to cache for future builds |
💡 Why caching matters: Without caching, Docker rebuilds every layer from scratch (~2-3 minutes). With
type=ghacaching, unchanged layers are reused — builds drop to ~30 seconds.

Docker Hub showing our pushed image with 5 tags. The main-c260cb1 tag maps to a specific Git commit. Repository size: 51.6 MB (thanks to our distroless multi-stage build).
Step 5 → Trivy Container Scan:
      - name: Trivy scan (optional)
        uses: aquasecurity/trivy-action@master
        continue-on-error: true
        with:
          image-ref: ${{ env.IMAGE_NAME }}:latest
          format: sarif
          output: trivy-results.sarif

      - name: Upload Trivy results
        uses: github/codeql-action/upload-sarif@v3
        if: always()
        with:
          sarif_file: trivy-results.sarif
| Keyword | What It Does |
continue-on-error: true | Trivy findings don't block the pipeline — they're informational |
format: sarif | SARIF is a standard format that GitHub understands for its Security tab |
if: always() | Upload results even if the Trivy scan step finds vulnerabilities |

An actual failed Docker build from our pipeline. The error invalid tag "/node-ci-demo:main" happened because DOCKERHUB_USERNAME was empty — the secret wasn't set yet. After adding the secret, this was resolved.
6.8 Job 5: Deploy with Automated Rollback
  deploy:
    name: Deploy
    runs-on: ubuntu-latest
    needs: docker
    if: github.event_name == 'push' && github.ref == 'refs/heads/main'

    steps:
      - name: Configure AWS credentials (OIDC)
        uses: aws-actions/configure-aws-credentials@v4
        with:
          role-to-assume: ${{ env.AWS_ROLE_ARN }}
          aws-region: ${{ env.AWS_REGION }}

      - name: Deploy via SSM Run Command
        run: |
          aws ssm send-command \
            --document-name "AWS-RunShellScript" \
            --targets "Key=instanceids,Values=${{ env.EC2_INSTANCE_ID }}" \
            --parameters 'commands=["set -e","CURRENT_IMAGE=$(docker inspect -f {{.Image}} ${{ env.CONTAINER_NAME }} 2>/dev/null || echo none)","docker pull ${{ env.IMAGE_NAME }}:latest","docker stop ${{ env.CONTAINER_NAME }} || true","docker rm ${{ env.CONTAINER_NAME }} || true","if docker run -d --name ${{ env.CONTAINER_NAME }} -p ${{ env.APP_PORT }}:5000 ${{ env.IMAGE_NAME }}:latest; then echo Deploy succeeded; else echo Deploy failed, rolling back; [ \"$CURRENT_IMAGE\" != none ] && docker run -d --name ${{ env.CONTAINER_NAME }} -p ${{ env.APP_PORT }}:5000 $CURRENT_IMAGE; exit 1; fi"]' \
            --comment "Deploy node-ci-demo" \
            --region ${{ env.AWS_REGION }}
Step 1 — OIDC Authentication:
The aws-actions/configure-aws-credentials action:
Requests a JWT token from GitHub's OIDC provider
Sends it to AWS STS (Security Token Service)
AWS validates the token against the trust policy
Returns temporary credentials (valid for ~15 minutes)
Step 2 — SSM Run Command (The Deployment Script):
Here's what the script does, broken into readable steps:
# 1. Strict mode — exit immediately if any command fails
set -e

# 2. Save the currently running image hash (for rollback)
CURRENT_IMAGE=$(docker inspect -f '{{.Image}}' node-ci-demo 2>/dev/null || echo none)

# 3. Pull the latest image from Docker Hub
docker pull deviltalks/node-ci-demo:latest

# 4. Stop and remove the old container (ignore errors if it doesn't exist)
docker stop node-ci-demo || true
docker rm node-ci-demo || true

# 5. Start the new container — if it fails, rollback!
if docker run -d --name node-ci-demo -p 5000:5000 deviltalks/node-ci-demo:latest; then
  echo "✅ Deploy succeeded"
else
  echo "❌ Deploy failed — rolling back!"
  # Restore the previous working image
  if [ "$CURRENT_IMAGE" != "none" ]; then
    docker run -d --name node-ci-demo -p 5000:5000 $CURRENT_IMAGE
  fi
  exit 1
fi
What makes this deployment script production-grade:
| Feature | How We Do It | ||
| Image hash capture | Saves CURRENT_IMAGE before doing anything destructive | ||
| Automatic rollback | If new container fails to start, restores previous image | ||
| Zero-downtime recovery | Rollback is automatic — no manual intervention needed | ||
set -e | Any command failure stops the script — no partial deploys | ||
| ` | true` on stop/rm | Gracefully handles first-ever deployment (no container to stop) |

AWS Systems Manager executing our deployment script via SSM Run Command. You can see the full command JSON response including the CommandId, the deployment commands with masked secrets (***), the target EC2 instance, and the "Pending" status. Notice how IMAGE_NAME and AWS_ROLE_ARN are masked → GitHub never exposes secrets in logs.
7. Branch Protection & Governance
A pipeline is only as good as the rules protecting it. Without branch protection, anyone with repo access could push directly to main and bypass all checks.
Setting Up Branch Protection Rules
Go to GitHub → Settings → Branches → Add rule → Branch name pattern: main
Enable these settings:
| Setting | What It Does |
| ✅ Require pull request before merging | Forces code review — prevents accidental pushes |
| ✅ Require status checks to pass | Blocks merge if Build / Test / Security / Docker fails |
| ✅ Require code reviews (1+ approver) | At least one peer must approve the PR |
| ✅ Dismiss stale pull request approvals | Re-review required if new commits are added after approval |
| ✅ Require branches to be up to date | Prevents merge conflicts in production |
| ✅ Restrict who can push | Only specific users/teams can bypass (rarely used) |
What happens when someone tries to push directly to main:
$ git push origin main
remote: error: GH006: Protected branch update failed
remote: error: Required status check "Build" is expected
remote: error: At least 1 approving review is required
💡 Without branch protection: Any developer with push access can push broken code directly to production. With it: Every change must pass CI checks AND be reviewed by a peer before merging.
Skipping CI (When You Need To)
Sometimes you push documentation changes or .md edits that don't need a full pipeline run. Add [skip ci] to your commit message:
git commit -m "docs: update README formatting [skip ci]"
git push origin main
GitHub Actions recognizes [skip ci], [ci skip], [no ci], or [skip actions] in the commit message and will not trigger any workflows for that push.
⚠️ Use sparingly. Only skip CI for documentation-only changes. Never skip CI for code changes — that defeats the entire purpose of the pipeline.
The Complete Governance Model
| Protection Layer | What It Prevents |
| Branch protection | Direct pushes to main → forces PR + review |
| PR status checks | Merging PRs with failing Build / Test / Security |
| OIDC (no static keys) | Leaked AWS credentials → tokens auto-expire in 15 min |
| GitHub Secrets | Credentials in code → encrypted, masked in logs, no fork access |
| npm audit + CodeQL | Vulnerable dependencies and code-level security flaws |
| Trivy | OS-level vulnerabilities in the Docker image |
| Automated rollback | Failed deployments staying live → auto-restores previous version |
| Audit trail | Untraceable changes → every commit, PR, and deploy is logged |
8. Troubleshooting — Every Error We Hit
These aren't hypothetical — these are errors we actually encountered while building this pipeline. Every fix is documented.
❌ Error 1: npm ci fails — "package-lock.json not found"
npm ERR! The `npm ci` command can only install with an existing package-lock.json
Root cause: You ran npm install locally but never committed package-lock.json.
Fix:
npm install                # generates package-lock.json
git add package-lock.json
git commit -m "chore: add lockfile for CI reproducibility"
git push origin main
❌ Error 2: Docker push — "denied: requested access to the resource is denied"
ERROR: denied: requested access to the resource is denied
Root cause: One (or more) of these:
DOCKERHUB_TOKENis your password, not a PATPAT lacks Write permission
DOCKERHUB_USERNAMEdoesn't match the image name prefix (e.g., image isdeviltalks/node-ci-demobut username isdeviltalks2)
Fix:
Go to Docker Hub → Account Settings → Security → Delete old token
Generate a new PAT with Read & Write permissions
Update the
DOCKERHUB_TOKENsecret in GitHubVerify
IMAGE_NAMEstarts with your exact Docker Hub username
❌ Error 3: Docker build — "invalid tag: invalid reference format"
ERROR: failed to build: invalid tag "/node-ci-demo:main": invalid reference format
Root cause: The DOCKERHUB_USERNAME secret is empty or not set. The IMAGE_NAME env var becomes /node-ci-demo (leading slash) instead of deviltalks/node-ci-demo.
Fix:
Go to GitHub → Settings → Secrets → Actions
Verify
DOCKERHUB_USERNAMEexists and has a valueRe-trigger the pipeline:
git commit --allow-empty -m "retry: fix docker username secret"
git push origin main
💡 This error is visible in the build logs screenshot above — line 222 shows the exact error.
❌ Error 4: Deploy fails — SSM "Command failed"
Root cause: Usually one of:
SSM Agent is stopped on EC2
EC2 instance doesn't have the
AmazonSSMManagedInstanceCoreIAM policyPort 5000 is blocked in Security Group
Instance is in a different region than
AWS_REGION
Fix:
# On the EC2 instance — restart SSM Agent:
sudo systemctl restart amazon-ssm-agent
sudo systemctl status amazon-ssm-agent

# Verify Docker is running:
sudo systemctl status docker
In AWS Console:
IAM: Verify the EC2 instance role has
AmazonSSMManagedInstanceCoreattachedEC2 → Security Groups: Edit inbound rules → Add TCP 5000 from
0.0.0.0/0Verify region: Make sure
AWS_REGIONin your workflow matches the instance's actual region
❌ Error 5: OIDC fails — "Not authorized to perform sts:AssumeRoleWithWebIdentity"
Error: Not authorized to perform sts:AssumeRoleWithWebIdentity
Root cause: The sub claim in your IAM trust policy doesn't match your repo.
Fix:
- Verify the trust policy has the correct repo:
"token.actions.githubusercontent.com:sub": "repo:Push1697/devops-portfolio:*"
Verify
permissions.id-token: writeis set in your workflowVerify the OIDC Identity Provider exists in IAM with the correct audience (
sts.amazonaws.com)
❌ Error 6: Docker login fails — "Username required"
Run docker/login-action@v3
Error: Username required
Root cause: Secret name in the workflow doesn't match what's stored in GitHub. This is case-sensitive!
Fix:
- Check your workflow file:
# ✅ Correct — matches the secret name exactly
password: ${{ secrets.DOCKERHUB_TOKEN }}

# ❌ Wrong — different secret name
password: ${{ secrets.DOCKER_SECRET_KEY }}
- In GitHub Secrets, verify the exact names:
DOCKERHUB_USERNAMEandDOCKERHUB_TOKEN
❌ Error 7: Trivy upload fails — "Path does not exist: trivy-results.sarif"
Error: Path does not exist: trivy-results.sarif
Root cause: The Trivy scan step was skipped or failed (often because the Docker build failed first), so no SARIF file was generated.
Fix: This is usually a downstream effect of another error. Fix the Docker build first, and the Trivy upload will work. The if: always() on the upload step ensures it runs even when Trivy fails, but it can't upload a file that doesn't exist.
9. Summary
This isn't a toy pipeline. It's a production-grade delivery system that handles:
| Pillar | How We Address It |
| Security | OIDC (no static keys), GitHub Secrets, npm audit, CodeQL, Trivy |
| Reliability | npm ci for deterministic builds, automated tests |
| Recoverability | Automated rollback on deploy failure |
| Traceability | Docker tags tied to Git commit SHAs |
| Efficiency | Parallel jobs, Docker layer caching (type=gha), concurrency |
| Governance | Branch protection, PR reviews, status checks, audit trail |
By following this guide step by step, you've built something real — not a tutorial demo, but the same patterns used in production systems at companies shipping code daily.
Built as part of the DevOps Portfolio — Week 1: CI/CD Foundations.